Mash tun Lid
The lid had to perform several functions. First and foremost what everybody wants a lid for, keep the heat in and make heating times faster. Secondly it had to be able to support the recirculation and sparge manifolds in place. Lastly, I wanted it to be rigid and fitted to the top so that so that the lid couldn’t accidentally fall off and I could add a mechanical stirrer later date.
Construction materials
For materials, I picked up a sheet of 10 gauge (heavy!) stainless steel at my favorite salvage yard, Alco Metals. The piece was large enough to cut two lids out of at 17"x48" and costs $33. The sheet metal even still had the plastic sheeting to protect the one side that’s already polished. I also used my favorite material, 1" square stainless tubing.
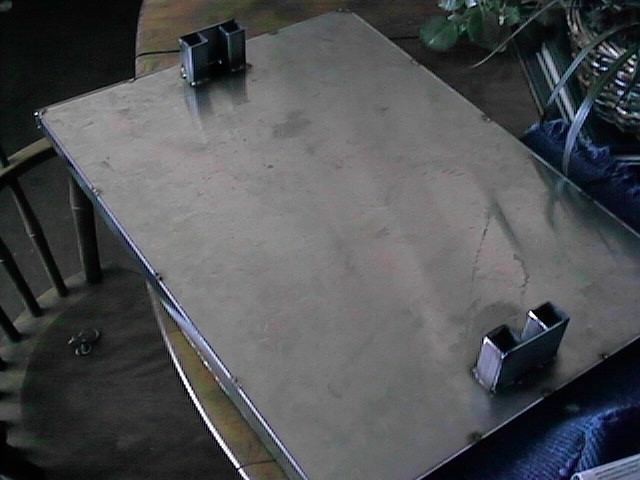
Figure 3: Mash tun lid with holds for both manifolds
I cut the sheet metal a little larger than the mash tun. I also cut 4 strips 1" wide to place around the edge of the lid for reinforcement and to create a good seal with the mash tun. The edge pieces where only tacked on since welding them all around takes time and doesn’t significantly strengthen the lid.
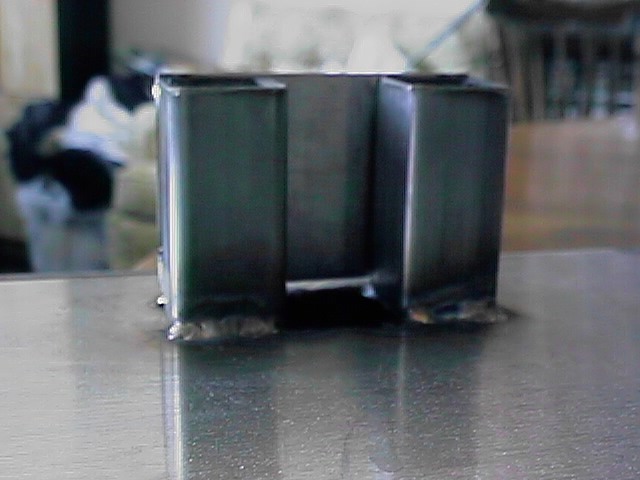
Figure 4 Close up of the bracket used for clamping one of the manifolds
I cut holes at either end of the lid with a 1 1/8" drill bit and then filed the edges square so that the square tubing would fit through. Beside each whole on the lid I put two pieces of square tubing, spaced at a little larger than 1" so that he square tubing neck of the manifold would fit between them. I tacked a small piece of stainless steel to one back of these two pieces to keep the distances uniform and have something I could clamp the manifold necks to. When I want to set the manifolds at a particular height, all I have to do is put a C clamp or vise grip and clamp the neck to the steel back.
| The Mash Tun vessel | Sparge Manifold | Recirculation Manifold | Mash Lid | Insulation | HOME |