|
||||
|---|---|---|---|---|

|
February 1998 Volume
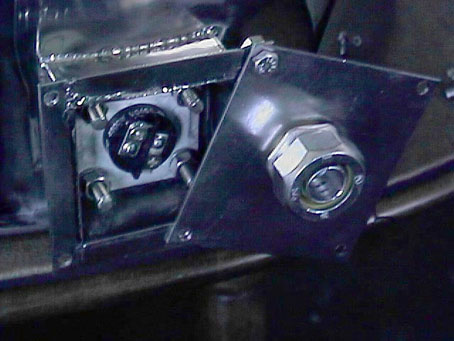
21, Issue 2 How to mount an electric heating element into the boil kettle I needed a way to heat the boil kettle electronically since I planned on using a computer to control the brewery. I could have gone with gas but that would have necessitated using electronic ignition and gas valves. I wanted to do the brewing indoors in any case so electronic is the way to go. The heater element is a 4500 watt 220v bolt on element from Grainger. I got the low density type to try and reduce scorching. The element is only about $10 bucks so its cheap. The way this element works is it has an element inside of a flange with four holes in it for bolting on to your water heater. I could have used the screw in type of element but I've heard its hard to find the stainless couple with the same threads as the element. The electrical connection to the element is in the form of two screws on the back of the element. The big problem is you don't want these terminals exposed because if water gets on them ... ZAP! My solution was to build a cover around the element that could be kept dry at all times. I welded a box around the element with an outside lip. By drilling holes into the lip and a flat cover, I can easily seal the element against the water and still allow access to the element and the terminals.
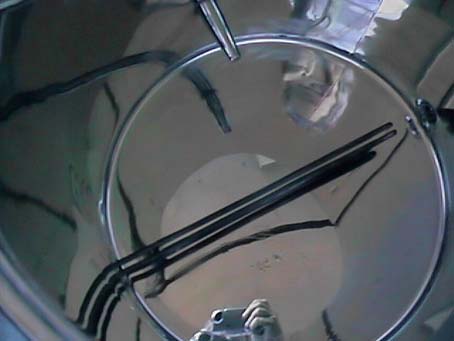
The element and cover, shown in the open position. In order to get the wires to the terminal, I went down to my local hardware store and bought electrical conduit and connectors and mounted them on to the cover of the element box. The wiring to the element will go through water proof conduit from the boil kettle the the relay control which is also sealed. One of my assumptions with the bolt on element is that the element would seal against the metal using the gasket that came with it. I wasn't sure that the element would seal well around the contour of the boil kettle since the flange on the element was designed to fit against a flat surface. When I install the element and tested it for its seal, a few turns of the bolts sealed the element to the side and made it water tight. I will test it again when I turn up the burner. For safety sake, I might put a small hole at the bottom of the element box so that if water gets into the element via leakage, the water will drain rather than collect in the box. In addition, I'm going to integrate a 220V GFI into the outlet I get power from so that if it does short out, it will turn off the power immediately.
Picture of the element after installation. The mirror polish also shows the author. |
|||